About Course Design

The horse's field of vision

The horse's eye are placed at the side of his head, and he has a lateral field of vision of 160-170 degrees on either side of him. The horse can use both eyes independently (this is known as monocular vision) or both eyes together (known as binocular vision). The very small field in front of him is the binocular vision field which allows him to judge distances. To see objects at a short distance a horse must also focus the lens The bigger field, the monocular vision field, allows him to independently see clear more distant objects. If something is disturbing the horse at the side of him, he will use his eyes monocularly and then he will not see clearly, the small area immediately in front of him - he will see only, clearly to either side.

Head at 45 degrees
With the head at this angle, the horse can clearly see the area in front of him (2), when using his eyes binocularly. Above and below this area (1 and 3) is an area of blurred vision and, higher up, there is a blind spot (4).​
 

پیوست ها

  • 1.jpg
    1.jpg
    20 کیلوبایت · بازدیدها: 34
  • 3.jpg
    3.jpg
    16.9 کیلوبایت · بازدیدها: 32
  • 2.jpg
    2.jpg
    8.8 کیلوبایت · بازدیدها: 32
آخرین ویرایش:
History and ethics

Short timeline of jumping history (powerpoint)
The history of showjumping started 140 years ago with the first Horse Show of the Royal Dublin Society, year 1864. Two jumping competions were held to test the ability of horses for fox hunting.
Later many new tournaments was founded like Concours Central, Paris (1866), National Horse Show in New York and Madison Square Garden (1883). In the beginning of the jumping sport the roule of the Course Designer was very poor.
As a example in Aachen CSIO, 1937, was 39 Judges and Members of the Appeal Committe mostly high ranked military and/or nobility and only one man low ranked military responsible for the obstacles.
The image and function of the Course Designer changed through the history, mostly due to, great personalities like General Lombardi (Italy), Col. Brinkmann (Germany), Pamela Carruthers (Great Britain) and Dr.h.c. Bertalan de Nemethy (USA)
Today the demand of the Course designer is very high and you will need a lot enthusiasm, passion, patience and long time of schooling as succesful rider in jumping competions, practical experience of many small Shows, experience as trainer, assistance to experienced Course Designers, but also to participate on many seminars held by National Federations , FEI. or the Aachen School of Course Design founded 2004 by the most famous and leading International Course Designers Arno Gego, Olaf Petersen and Leopoldo Palacius.​

Olympic Games, Berlin 1936

Olympic games, Sydney 2000,
Course Designer: Leopoldo Palacios​


Good course designing, needs well educated, experienced, independent, honest, responsible and
diplomatic personalitys based on good horsemanship. The course designer must love his sport and use his high knowledge, to promote the jumping sport world a wide. His knowledge about the history of jumping should help him to keep the sport close to the roots of our sport, (nature-based sport and ecology ) It is importand to create an exciting sport of fighting the best against each other in an atmosphere of excellance with interesting and rhytmical lines which encourage free forward movement of the horse.
The obstacles should be aesthetically and nice looking. Course designers should look for balancing the different kinds of test, such as skill of horse and rider, galloping performance, jumping ability and condition in mean time asking for solvable tests, having in mind the welfare of the horse.
The sponsors logos, which presence in a Arena should be decent, limited, sympathetic, variable and in best relation to other obstacles and decoration, avoiding to make comercials of all obstacles. The sponsor name or logo should be sympathetic, variable and fit together with the overall appearence of the tournament. Sponsoring is very important but on a fair basis of giving and taking and marketing may never have influence on sport or rule the sport.​
 

پیوست ها

  • 4.jpg
    4.jpg
    162.1 کیلوبایت · بازدیدها: 4
  • 5.jpg
    5.jpg
    211.8 کیلوبایت · بازدیدها: 4
آخرین ویرایش:
Masterplan and courseplan

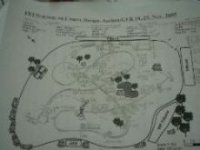
The masterplan is an overall concept of a course on the tournament. Based on freehand drawn design by pencil and rubber in scale.
The masterplan should contain information about:
1. North and south
2. Size and shape of arena in scale
3. Other facilities of arena
4. Position and direction of obstacles
5. Type of obstacles, measurements of obstacles
6. Information about the distances between related obstacles
7. Name or sponsorname of the obstacles (colour)
Different Course Designers have different methods but I almost use this method which I will explain here:
1. First draw the course line, use only pencil and rubber​

2. Put obstacles on your line but not type of obstacles
3. Decide type of obstacles in combinations​

4. If there is a jump off, now you can plan the kind of obstacles in the jump off course​

5. Now when you have a satisfied jump off, you can define the other obstacles in the basic course.
Dont forget to draw with a long line cross the combination if you use a closed combination​

6. In the next step you will fill in information about measurements of obstacles and distances.
7. You can also write down which obstacle,colour and other information you and your assistents need.​

Material list

The masterplan together with the material list made by Visio 2002 and the special course designing program PPD helps your assistents to understand your thoughts.​


Combination plan

Helps you to not repeat same type of combination during a tournament.
You can also write down the distance and dimensions of the obstacles​

Final course plan

With the software “PPD” (Professional Parcours Design) and a laptop you can draw and prepare at home or at the horse show professional course plans. With a simple mouse click you insert different type of fences, distances, dimensions – all in scale. You print working plans for assistants, official course plans, special plans for media, internet or TV.
After the show all your plans are in your computer file and help you for the next events. PPD is a world wide existing program for course designers, and most International Course Designers​


PC Tool for designing Show Jumping Courses

EcCourse Design will help you to design and present your plans for riders, judges, sponsors, spectators, media and of course for your assistants.
EcCourse was launched in Swedish in October 2006. After a testing period the PC Software will be translated to English in November.​
 
Building obstacles in the arena

After you have made your masterplan, you can start to build up the obstacles in the arena. It is always easier to use a good method and now I will explain how I do it.
1. Start putting out the poles on positions where you have planed to place the obstacles, use one pole for verticals, two poles for oxers and three poles for tripplebars. Use the coulored poles you have decided on the masterplan.
Don`t let your assistents bring in more poles than you need for the positions of the obstacles because then nobody will know anymore what is what. At this stage don`t let anybody bring in any more material than the poles you need.​


2. When you are sure about the position of the poles and distances between them, you can bring in the wings (only the wings)


3. Now you can put the poles on the wings, but only the upper poles. After you have measured the height and the widht you can start to fill up with poles and the other material you want.
 
آخرین ویرایش:
The influence of colours and contrasts

Obstacles can be easier or more difficult to jump depending on use of colours and contrasts.
Here are some examples:

No.1 The poles are totally white and without any contrasts which makes this obstacle most difficult of this four examples.

No.2 Nearly the same difficultnes but the black lines on the poles makes it little easier to jump for the horses.

No.3 The red painted parts on the white poles makes this obstacle much easier than examples No.1 and 2.

No.4 This is the easiest obstacle of them all because of clear contrast between red and white.

Easibility of faults


The development of the cup dimensions has changed through the years


Cup dimensions of today


Other types of cups for planks, gates and other material
 
آخرین ویرایش:
Definition of obstacles (FEI)

Straight obstacle
An obstacle whatever its construction can only be called straight when all the parts of which it is composed are positioned in the same vertical plane on the take off side, without any rail (pole) hedge, bank or ditch in front off it. A wall with an inclined face may not be called a straight obstacle except in puissance and power and skill competions.​

Spread obstacle
A spread obstacle is an obstacle which is built in such manner that it requires an effort both in spread and in height​

Here are different examples of obstacle types in profile​

Measuring between obstacles


When you are measuring the length between two obstacles, you must measure from the obstacle`s base on the landing side to the next obstacle`s base on the take off side


Here you can see from a another angle how to measure in a correct way. Personaly I dont measure from the liverpool (with a vertical) if the lenght is smaller than 1,30m and if it is not more than 0,60m in front off the obstacle. It doesnt affect the need of the distance so much.​

If you have obstacles in a straight line you must also cross measure with a fiberglass measuring tape​

Here is a example of what can happen if you don`t cross measure. The (heart) obstacle behind is not in line​

In the measuring tool box, you will need at least two fiberglass measuring tapes, one of 50 m and one of 20 m. You will also need a meter stock of two meter. To have your own needles with you can minimize your problems when you need to announce your courseplan.​
 
Take off and landing, need of distance

Horses without skill and capacity must come closer to the obstacles and the zone of take-off and landing relatively decreasing with the dimension of the obstacle.
The take-off and landing distance are also growing related to speed and/ or height.
The spread width can decrease the take-off and landing distance.
Here you can see the difference, depending on obstacle height. The higher obstacles width of the zone on take-off side and landing side is much smaller.​

Normal take-off and landing distance at obstacles 1,30m and higher
Vertical​

Oxer​

Triplebar​

Normal take-off and landing distance for water jump
Water​

This examples will show you the need of shorter or longer distance between related different obstacles.
Example No. 1 needs the longest distance, example No.2 shorter, No.3 even shorter and example No. 8 the shortest distance​

Example of distance and how to calculate

Your experience as competion rider, trainer and as Course Designer will help you to find the correct distance between two related obstacles. It is not enough to use the calculate table.
Dont forget to have in mind the influence of the speed in the competion. Higher speed means longer strides. You can self calculate the length of the stride, by dividing minimum speed X m/min. with 100.
Be carefule sharp turns and small arenas can make more difficult for riders and horses to keep the minimum speed.
Here you can see how to calculate the need of the distance.​

Example of possible distance between vertical and oxer, 350m/min.​

Example of possible distance between oxer and vertical, 350m/min.​

Example of possible distance between oxer and oxer, 350m/min.​

Example of possible distance between vertical and vertical, 350m/min.​

Here you can see five strides examples with same first obstacle, same lenght of strides but with different type of second obstacle.
All examples have same take off point at the second obstacle but with different take off distance depending on obstacle type.​

Examples with three strides​
 
آخرین ویرایش:
Measuring course length

Measuring the course
Measuring wheel for measuring the course length is one of the most importand tools for the Course Designer. You can buy on the market different qualities of measuring wheels. In longterm it is better to buy a heavier wheel of better quality to minimise wheel slip which can be in sand arenas up to 10%.
In nowdays you can buy high quality software programs for course designing and you can measure the length by computer, but never forget to control by measuring wheel, after you have buildt the hole course and before the riders are alowed to inspect the course.
It`s important to measure the normal way without shortening or giving generous additions. The length of the course is never douptful, there is only one length for a certain course, but curves should be related to the importance and difficulty of the cla.
The course length have nowdays more and more importance and have become the "obstacle number 15" and a not correctly meaesured course will destroy the character of a class.
To get the Time alowed in seconds, you must divide the lenght of the course in meters with minimum speed and then multiplicate with 60.​

Since three years I trye to put the measured course line on the courseplan and the riders don`t ask me or the assistents any more, if we have measured short or long. It is more fair to the riders who starts in the beginning, specielly in competions when the tempo is higher than 350m/min.​